Category Archives: hardware

Updating an NXP MCU-Link to work with OpenOCD

Not just OpenOCD, but just.. get it updated.

MCU-Link is a USB-HS “CMSIS-DAP” compatible debug interface, cheaply available. It has a 2x5x1.27mm cortex debug connector, a bonus usb2uart TTL on 2.54mm pins, and even has the 1.27mm 10pin cable in the little case. Supports SWO trace at ~9M they say. Excellent!

As shipped it was running a very old firmware, older than they even have in their release notes. MCU-LINK r0FF CMSIS-DAP V0.078 OpenOCD didn’t even recognise this.

NXP Offers a “MCU-Link installer for Linux” which at the time of writing was v3.128. which certainly sounds more up to date. I downloaded that, found a shell script that wanted to be run as root…. So, with less commentary, here’s how I jumped all the hoops to upgrade the MCU-Link to recent, and get it working properly…

$ sh MCU-LINK_installer_3.128.x86_64.deb.bin --noexec --target .
$ ar x MCU-LINK_installer_3.128.x86_64.deb
$ tar -xf data.tar.gz
$ cd usr/local/MCU-LINK_installer_3.128/
# Now, plug in the "firmware update" jumper and replug the dongle
# This flashes the firmware itself...
$ bin/blhost --usb 0x1fc9,0x0021 flash-image probe_firmware/MCU-LINK_CMSIS-DAP_V3_128.s19 erase 0

# and here we "configure" it, leaving it as unlocked as we can...
$ bin/blhost --usb 0x1fc9,0x0021 read-memory 0x9dc00  512 myoutdump.bin 0
$ bin/mculink_cfg myoutdump.bin --clear --no-device_vendor --no-device_name --no-board_vendor --no-board_name
$ bin/blhost --usb 0x1fc9,0x0021 flash-erase-region 0x9dc00  512
$ bin/blhost --usb 0x1fc9,0x0021 write-memory 0x9dc00  myoutdump.bin  0

Now, unplug, take off the jumper, and replug. You now have a much more standard looking USB descriptors, and running Product: MCU-LINK (r0FF) CMSIS-DAP V3.128

And… now it happily supports non-NXP parts too.

$ openocd -f interface/cmsis-dap.cfg  -f target/stm32g4x.cfg 
Open On-Chip Debugger 0.12.0+dev-00469-g1b4afd13f (2024-01-08-22:49)
Licensed under GNU GPL v2
For bug reports, read
	http://openocd.org/doc/doxygen/bugs.html
Info : auto-selecting first available session transport "swd". To override use 'transport select <transport>'.
Info : Listening on port 6666 for tcl connections
Info : Listening on port 4444 for telnet connections
Info : Using CMSIS-DAPv2 interface with VID:PID=0x1fc9:0x0143, serial=X1JALQM40K3MS
Info : CMSIS-DAP: SWD supported
Info : CMSIS-DAP: JTAG supported
Info : CMSIS-DAP: SWO-UART supported
Info : CMSIS-DAP: Atomic commands supported
Info : CMSIS-DAP: Test domain timer supported
Info : CMSIS-DAP: UART via USB COM port supported
Info : CMSIS-DAP: FW Version = 2.1.1
Info : CMSIS-DAP: Serial# = X1JALQM40K3MS
Info : CMSIS-DAP: Interface Initialised (SWD)
Info : SWCLK/TCK = 0 SWDIO/TMS = 1 TDI = 0 TDO = 0 nTRST = 0 nRESET = 1
Info : CMSIS-DAP: Interface ready
Info : clock speed 2000 kHz
Info : SWD DPIDR 0x2ba01477
Info : [stm32g4x.cpu] Cortex-M4 r0p1 processor detected
Info : [stm32g4x.cpu] target has 6 breakpoints, 4 watchpoints
Info : [stm32g4x.cpu] Examination succeed
Info : starting gdb server for stm32g4x.cpu on 3333
Info : Listening on port 3333 for gdb connections

Later, I’ll test the actual trace, just wanted to write these down while I still had it all.

Silabs Silicon Labs Configurator (SLC) command line

Wow, this is clearly not used much! but, it does seem to work so far? I’ve only taken a few steps, so this is note taking for me and the rest of the internet!

Installation

It talks about pip install -r requirements.txt, but even if you run it in a venv, somewhere it … escapes? and relies on system libraries, or something. You’ll get failures about unable to find jinja2 anyway. (I already had python3-jinja2 installed system wide, but it failed anyway. I had to remake the virtual env with

$ python3 -m venv --system-site-packages .env33
$ . .env33/bin/activate
(.env33) $ pip install -r requirements.txt

Generate a project

Ok, this is described (poorly, IMO) in their UG520: Software Project Generation and Configuration with SLC-CLI, (also linked from the bottom of the readme of the Gecko SDK) which at least is trying to document this process, so props for getting there I guess.

slc generate ~/SimplicityStudio/SDKs/gecko_sdk/app/bluetooth/example/soc_thermometer/soc_thermometer_freertos.slcp -d ~/src/slc-test1-soc-thermo -np --with brd4184a

Ok, that wasn’t so bad. You can use parts instead of brd ids, but that went ok. You’ll need to use “slc configuration …” to set your sdk path separately. I got a failure about “untrusted sdk” first, which was not described in UG520, but it at least gave me the command line to “trust” the sdk. I don’t know what the goals here are, I presume it’s important for secure boot stuff one day?

You can now simply “make” in the output directory. Not bad. Lots of files, lots of files but hey, command line ready to go…

Adding bluetooth configuration

Ok, but what about the UI for GATT config and things? Components I’m not covering (yet), I _think_ you just edit your .slcp in the output directory?) but I needed to know how to generate the bluetooth stuff again.

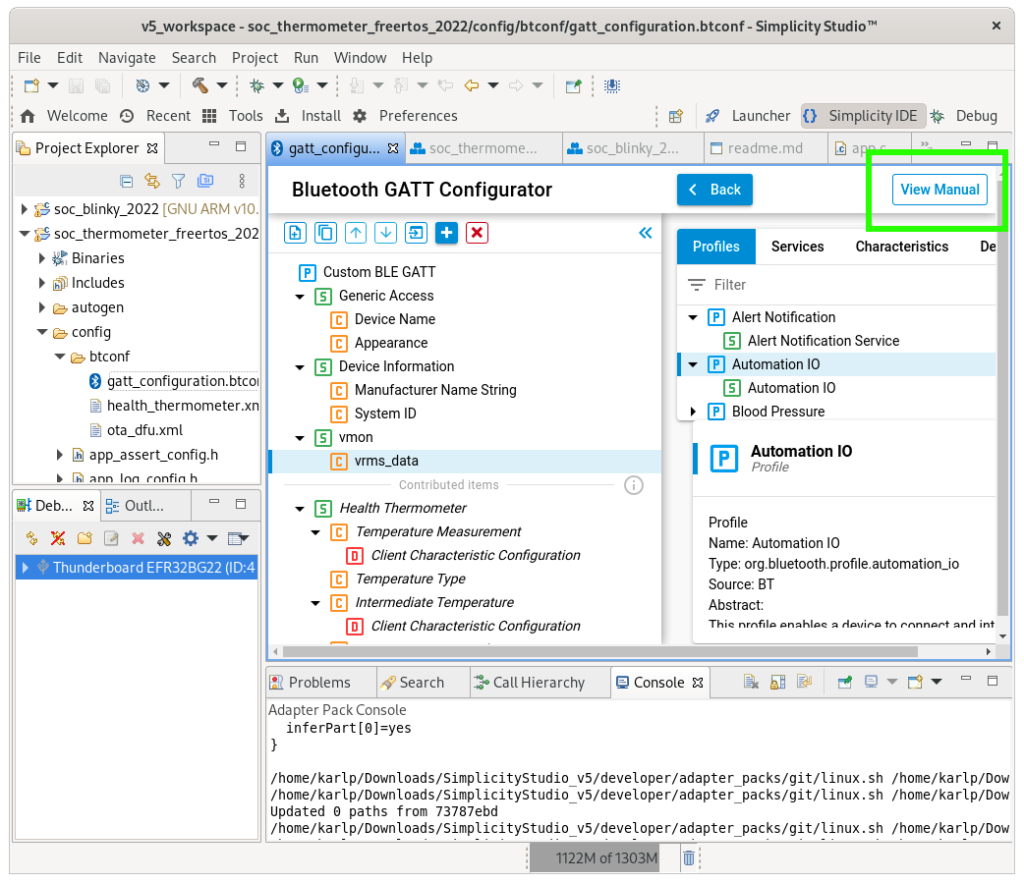
Bad news, you’re editing xml. Good news, it’s not terribly sucky, as long as you have a decent grasp of how bluetooth works. There’s online “help” for the syntax inside simplicity studio, if you click the “Manual” button

Click “View manual” to get the syntax for the XML

You can even, while you’re playing, do it in simplicity studio, and then rip it out again. Save in the UI, then right click the “gatt_configuration.btconf” and choose edit in text editor and view it as the plain old XML it is underneath. (What’s a namespace? What’s a QName? aintnobodygottime.gif)

Ok, so you edited your project_path/config/btconf/gatt_configuration.btconf and want to regenerate all the things that need regenerating, filling that sweet “autogen” folder right? slc has a temptingly named “btConfig” that sounds like it might do the right thing. So you run it and give it arguments until it’s happy right?

TL;DR:

$ slc btConfig generate -contentFolder $(realpath config/btconf) -generationOutput $(realpath autogen)

But how did we get there? Really?

$ slc btConfig generate -contentFolder config/btconfg -generationOutput autogen
Error: No 'gatt' node found in xml!
Error running command. Exit code: 1

Hrm. what? Maybe it wants the full path to the file, even though it says folder?

$ slc btConfig generate -contentFolder config/btconf/gatt_configuration.btconf -generationOutput autogen
Traceback (most recent call last):
  File "bgbuild.py", line 167, in <module>
    od = xml_to_dict(args.inputs)
  File "bgbuild.py", line 124, in xml_to_dict
    od[x] = GattXmlParser().to_string(x)
  File "/home/karlp/SimplicityStudio/SDKs/gecko_sdk/protocol/bluetooth/bin/gatt/gattxml.py", line 33, in to_string
    tree = ET.parse(xml)
  File "/home/karlp/tools/Silabs_slc_cli/bin/slc-cli/developer/adapter_packs/python/lib/python3.6/xml/etree/ElementTree.py", line 1196, in parse
    tree.parse(source, parser)
  File "/home/karlp/tools/Silabs_slc_cli/bin/slc-cli/developer/adapter_packs/python/lib/python3.6/xml/etree/ElementTree.py", line 586, in parse
    source = open(source, "rb")
FileNotFoundError: [Errno 2] No such file or directory: 'config/btconf/gatt_configuration.btconf'
Error running command. Exit code: 1

Well, progress, What? that smells like relative path brain damage….

$ slc btConfig generate -contentFolder $(realpath config/btconf/gatt_configuration.btconf) -generationOutput $(realpath autogen)

That… looks ok then? If you were clever, and had already committed the default state to revision control, you could check what it had done. And you’d see that you just lost the SiLabs OTA and health thermometer characteristics that were in the demo originally. If you look in the gatt_configuration.btconf, you also see that they’re not mentioned there! they’re just extra files dropped in the config/btconf directory. Ahhhh, so we don’t want to use the full path to the file, but we need to use our relative path workarounds we learnt later!

And that builds at least. Command line flashing/debugging/etc is for another day at least…. (We’re going to use SSv5 a bit more, we need to _work_ but at least we need to know how some of this might be possible

Simplicity Studio 5 on Fedora 34

UPDATE: You can do the steps below, and it will…. mostly work, but you’ll still run into broken things like, unable to enter text on the project config wizards or the bluetoot gatt configuration. The only _viable_ solution I’ve found really, is just to log out, and log in again choosing “Gnome on Xorg” and just not making wayland part of your daily headaches.


You still need the export GDK_BACKEND=x11 trick, and you still need the ./studio -Djxbrowser.chromium.dir=/home/$USER/.jxbrowser trick.

You also need to make sure you have git-lfs installed, or you will get fun errors like

/home/karlp/Downloads/SimplicityStudio_v5/developer/toolchains/gnu_arm/10.2_2020q4/bin/../lib/gcc/arm-none-eabi/10.2.1/../../../../arm-none-eabi/bin/ld:/home/karlp/SimplicityStudio/SDKs/gecko_sdk//protocol/bluetooth/lib/EFR32BG22/GCC/binapploader.o:1: syntax error

$ cat /home/karlp/SimplicityStudio/SDKs/gecko_sdk//protocol/bluetooth/lib/EFR32BG22/GCC/binapploader.o
version https://git-lfs.github.com/spec/v1
oid sha256:59b50942a2f0085fe2c87d0d038b13b8af279c742f0d3013b1d1ad6929070a3f
size 66088

Oops, that doesn’t look like a bootloader binary! This is actually mentioned on https://docs.silabs.com/simplicity-studio-5-users-guide/latest/ss-5-users-guide-overview/known-issues as issue 76584, but you wouldn’t find that til later. The tips are to reinstall, but you can also

cd ~/SimplicityStudio/SDKs/gecko_sdk && git lfs fetch && git lfs pull && echo "whew, that took aaaages"

You can _probably_ do tricks with git lfs to just pull the single files you need, and avoid pulling the 800meg or something at 1meg/sec that it took, but this got me a building and functional simplicity studio! wheee…..

Restoring a Kicad 6.99 PCB to Kicad 6.x

Yah, I was using the 5.99 nightlies via a “kicad-nightly” package on fedora, and after Kicad 6.0 came out, this moved (correctly) to the 6.99 branch, which brought in a whole slew of new changes to the project files, which are… not backward compatible. (Which I also understand… but…)

So, what to do? First, edit the “version” in the top of the file to something like 20211014.

Then try and open the file, see how far along you were and how much got munched….

Try and remove strokes

The following VIM regex will strip all the line settings out. :%s/(stroke.*type solid))// If you had customized lines, sorry, you can’t have that in 6.0 anyway. Try re-opening the file again…

Try also :%s/(stroke.*type default))//

Try and remove thermal angles

more vim regexping…. :%s/(thermal_bridge_angle \d*)//g

That was enough for my file. Hopefully this helps someone…

Vodafone Huawei R216 teardown

For work reasons, we had a couple of these LTE mobile hotspots deployed permanently. After about two years, they’ve failed, both with puffed up batteries. For no good reason I can think of, the devices don’t work with the battery removed, they just blink constantly. Still, they worked well right up to that point, so, what’s in one? I’ve not tried powering one up again properly, I’m not excited about ordering a spare battery for one, and it’s not (currently) interesting enough to try and provide power to the right place to fake the battery.

You can find the FCC internal photos under QISR216 but it’s blurry. We know it’s from Huawei, but that’s about it. You can also find a GPL compliance tarball that implies it runs android, and has some more details if you’re good at digging into that sort of thing (I’m not really) R216-open resource code.tar.gz

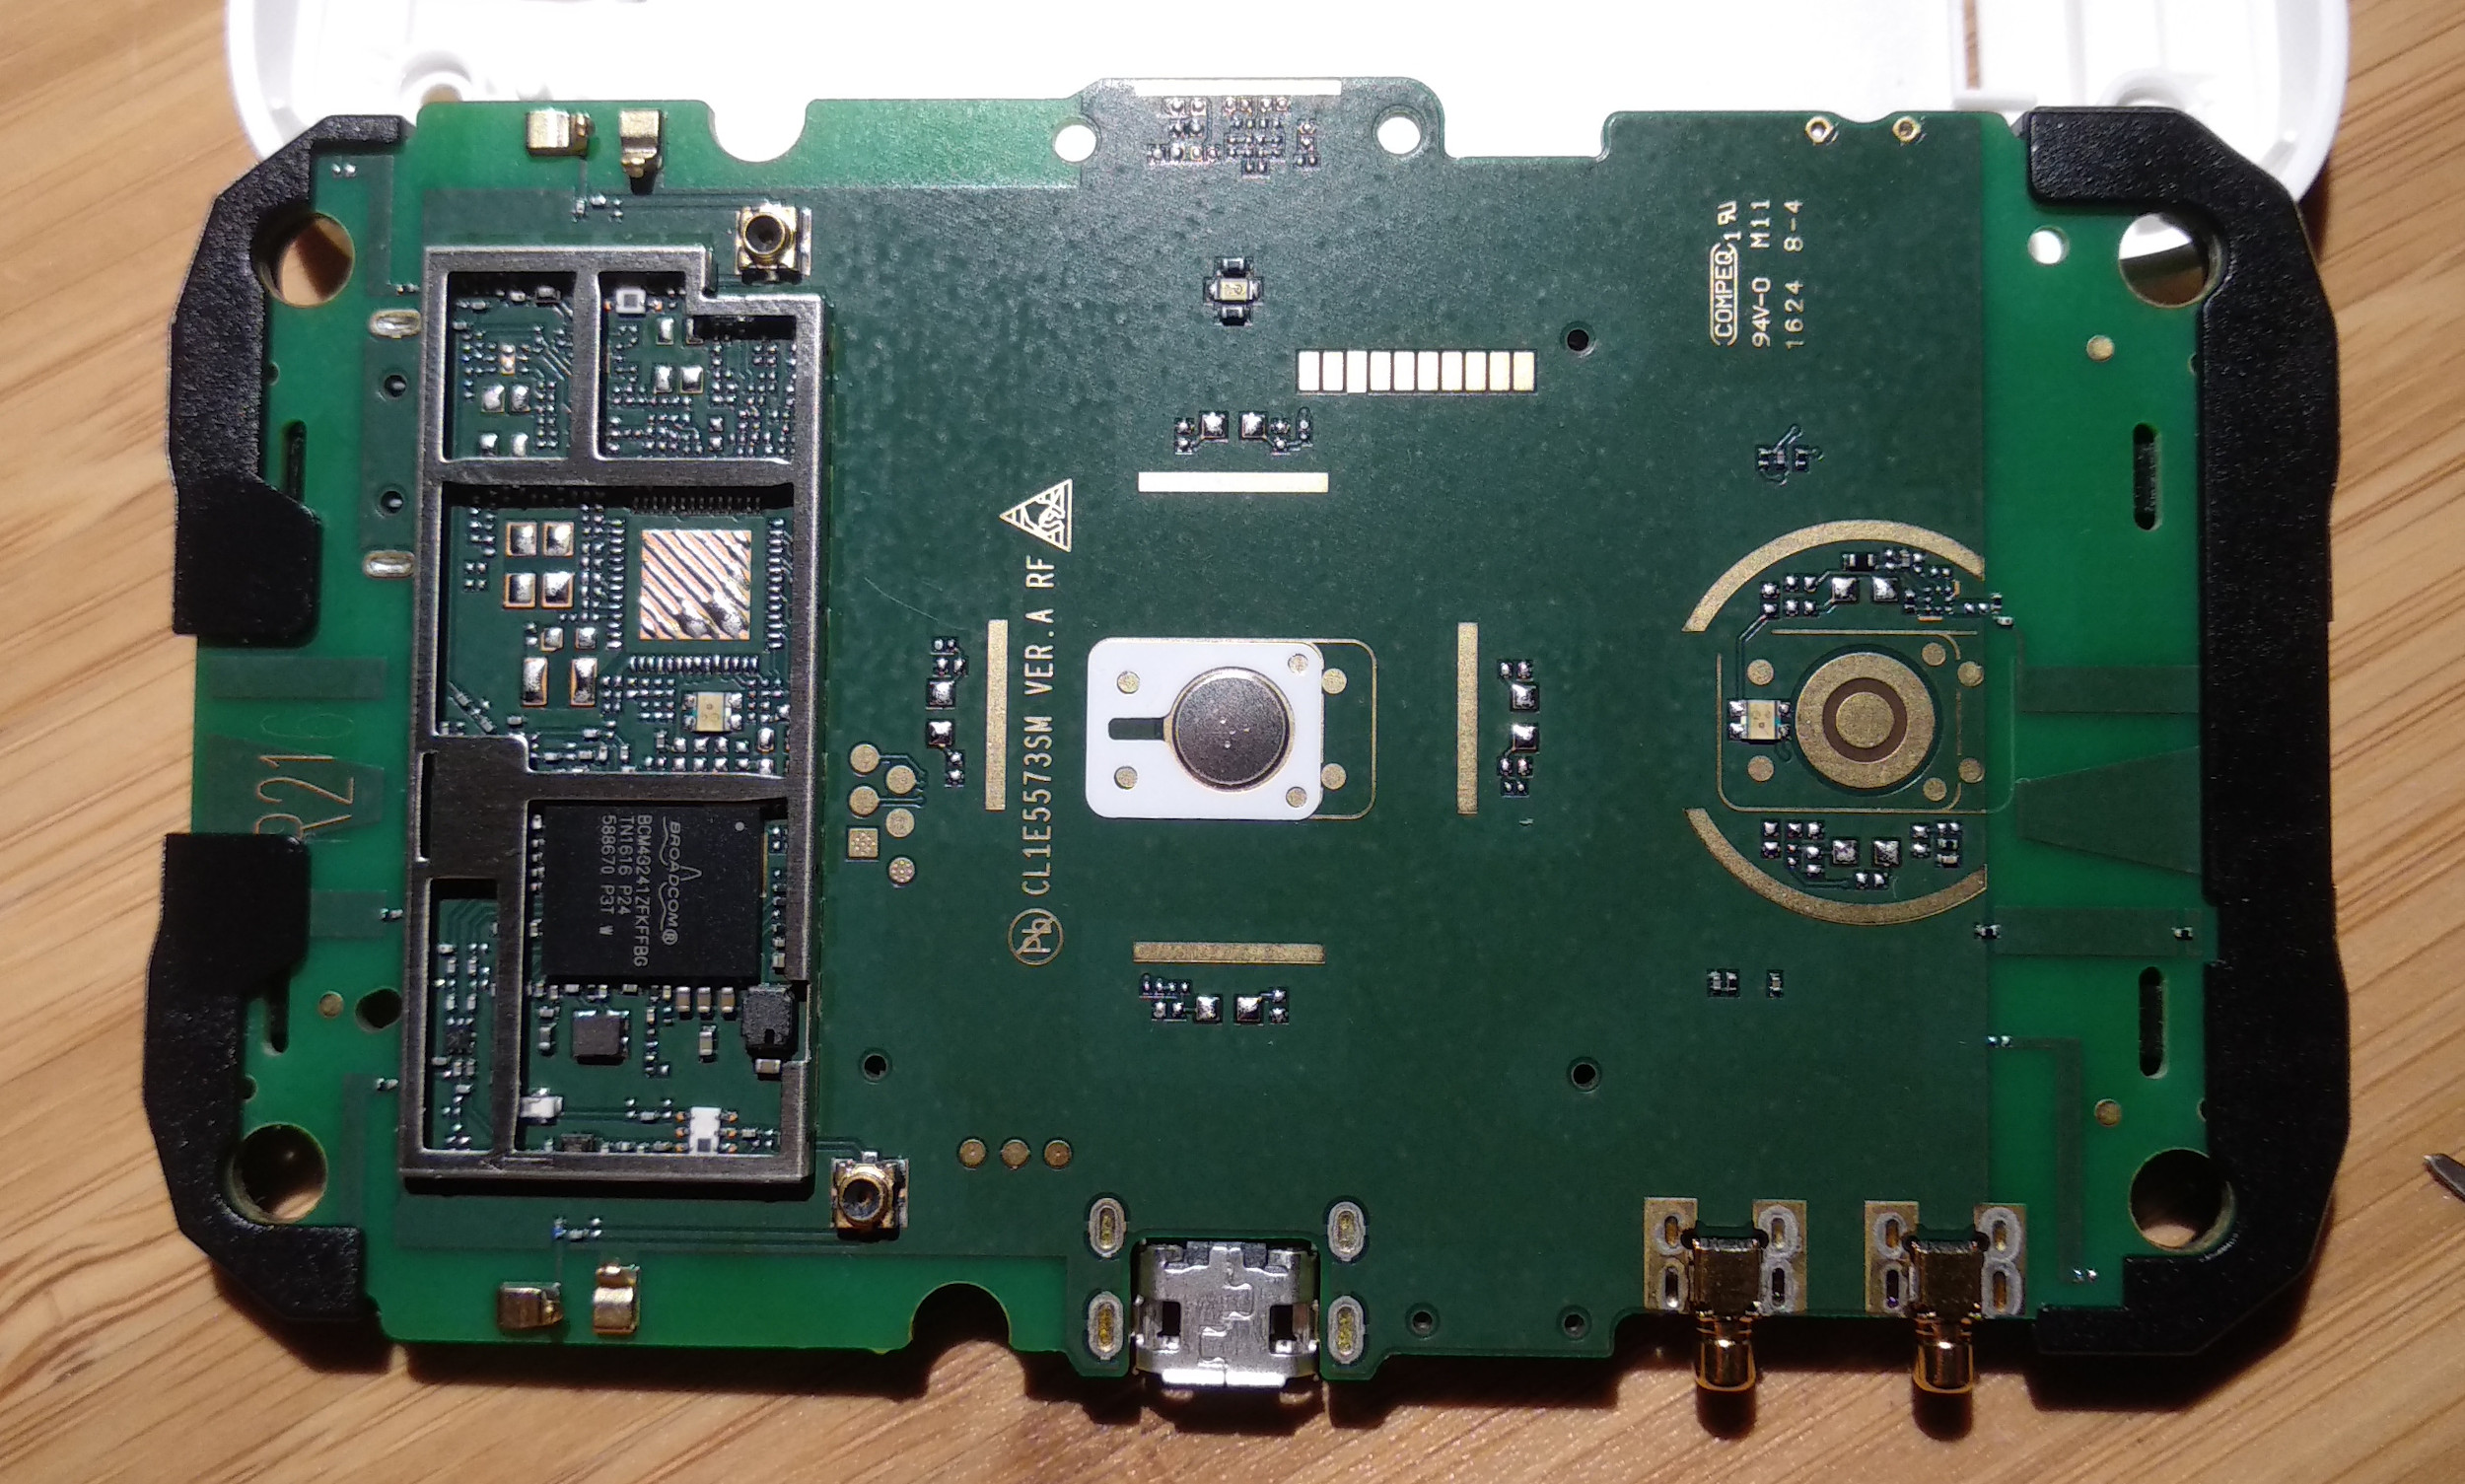
Here’s some photos of it’s guts with a bit of decoding. There’s a few spaces on the PCB for what I suspect is a SD card, and a 5GHz wifi radio, but it’s kinda ugly trawling through old product announcements to see if any of it was ever used. The row of circular pads on the PCB edge are actually available without disassembly, (there’s a row of holes inside the battery compartment that provides access to them), so that’s presumably a “useful” port for something. There’s another set of test pads by the wifi chip.

bcm43241 wifi chipset

The silver circle in the white field is actually a super slim pushbutton!

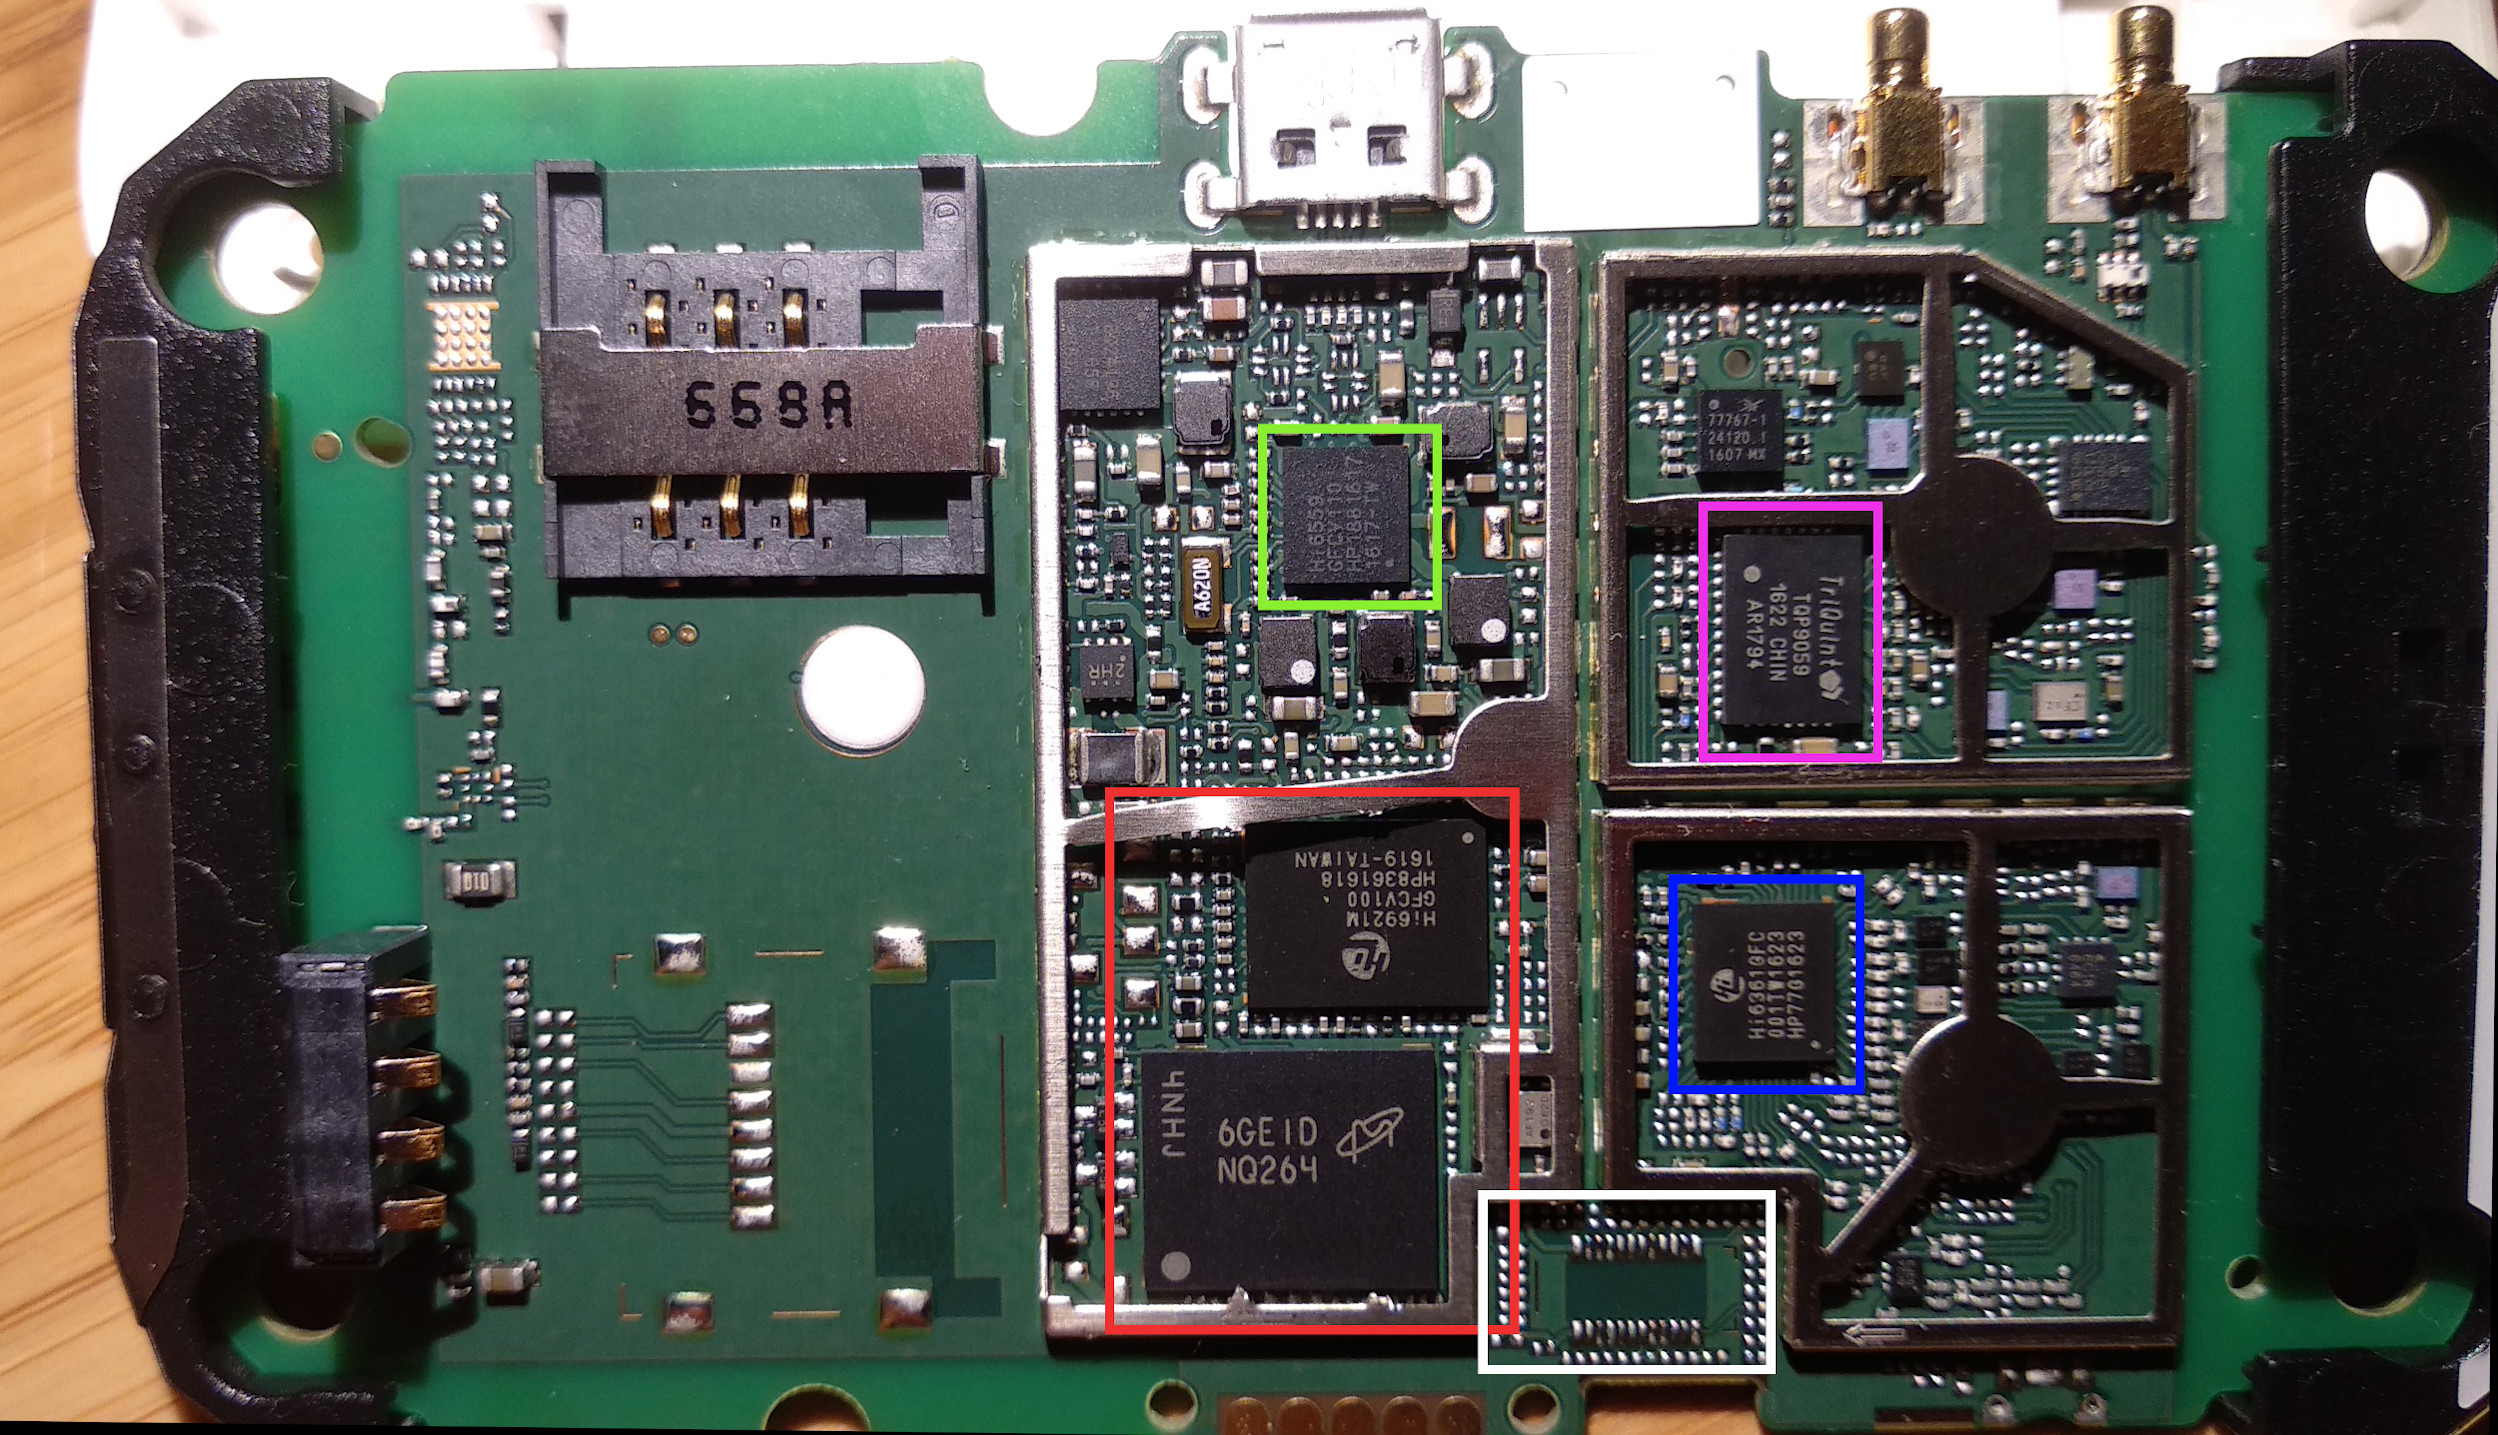
And now the “real” side

Green is HiSilicon HI6559, a PMIC from reading elsewhere. Red is some Micron flash, and a HiSilicon Hi6921M. You can read a bit more about the part here: https://github.com/Huawei-LTE-routers-mods/README/blob/master/balong_series.md

Blue is HiSilicon Hi6361gfc, presumably the LTE modem? Purple is the Qorvo multiband power amplifier

White box? No idea, not sure what would ever go on that footprint. The blank on the left is presumably a microsd socket.

There’s another one of these superslim membrane switches in the top right, between the micro usb and the optional external antenna connectors.

Nitsuka DX2E office phone teardown.

Full model on back of phone: DX2E-12BTXH. Manufactured October 1999. Internal PCB is clearly multi model, and also has the model MH 6330(1) and DX7C-12ANU5-A1
I have a few of these, they’re quite common, you can buy them on ebay for ~$35 or so, or similar models. I had the (very silly, but there was going to be some learning involved) idea of turning one of them into …. a phone. The plan is/was to hookup my own hardware to the handset, buttons and lcd screen, a little linux SoM or similar, and have it run some SIP softphone, running off 18650 batteries. Basically, make a phone…. into a phone. Not all terribly complicated, really.

So, time to open it up. Immediate difficulties are that the entire phone body is a giant PCB with button press pads. I’d loosely been planning on making a little USB HID device to capture all the buttons. (As we’re making a softphone, we don’t need DTMF or anything silly) Gonna have to rethink that now :) Anyway, what’s inside? Super easy to open, plain phillips head screws, no glue, no latches.

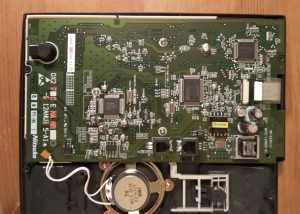
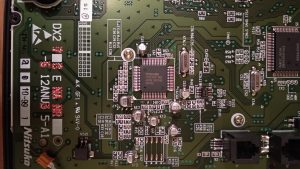
Three major ICs, the LCD connector, and the wonderful world of PSTN power supplies.

Let’s start at the top.

X2 is labelled Mitsubishi, M38003M6, and is by all accounts, a mask rom H8/300L series. Part numbers match up for Renesas (the current owner at least) I suspect this is handles all the programmable buttons and the LCD? X1 is a bit of a mystery, it’s labelled NEC D65825GF043. No idea what this is. Custom asic for phones? *shrugs*
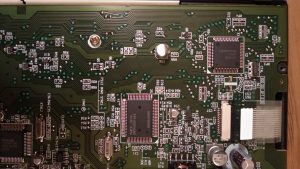
Down to the bottom…

X3, Toshiba TC35324F. I found TC35300 and TC35310, both DTMF decoders. I suspect that this listens in on it’s own keypad? Seems a bit excessive though?

X7 (what happened to X4/X5/X6) Is a plain old MC34119. An audio amplifier. The fun things with old tech like this, it talks about being “low current” with only 2.7mA Iq, suitable for batteries :) The datasheet I found even excitedly mentions that it contains 45 active transistors! Whee.

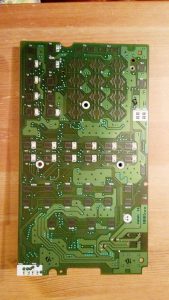
Finally, back side. Just keypads and LEDs really.

Anyway. There it is. Not really sure what next. It wouldn’t be completely unreasonable to just make a whole new pcb that fits under all the button pads, but that’s a lot more than I was planning on. JLPCB and elecrow will make pcbs that big for ~$10 each, but it’s a tedious button pad design. Could do a smaller PCB, only do some of the buttons, just for less hassle, but, meh. Could try and probe up some buttons, lay a big rats nest of wire down. Possibly the easiest way would be to desolder one of the ICs and put something in it’s place, a bunch of selective trace cutting, see if all the buttons go there? Or maybe just look for a different phone altogether…

Cypress CY8CKIT-049-42XX – PSoC 4200 kit – first impressions

(This was a draft I write in 2015, thought I might as well publish it where I’d left it)
Cool packaging, just like in the PSoC5LP kit. Despite looking similar, with a breakoff section that plugs into USB, the “programmer” side actually isn’t. It’s Cypress’s USB Serial bridge chip, the CY7C65211, and you program by using the UART bootloader on the PSoC 4200 target. Totally functional, totally valid. Not nearly as useful as a full debugger for application development of course, but in effect, it’s a full eval board for the usb serial chip. You can get a config tool that turns it into USB-SPI, USB-I2C, and USB-GPIO dongles. Neat, but still, I didn’t get this to evaluate usb serial bridge chips. On the bright side, it does at least detect properly out of the box as a serial UART in linux. (Unlike the KitProg on the PSoC5LP kit)

More arm android box conversion adventures

TL;DR: Still failing. Gave up again.

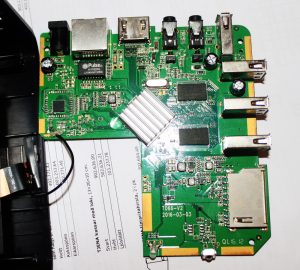
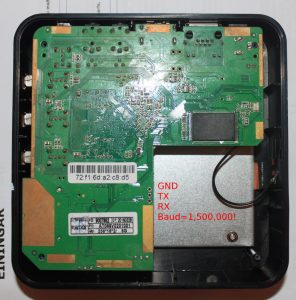
Back when I bought a RK3066 based device, I had seen rockchip developers start contributing directly upstream.  However, the RK3066 just missed the boat, and while I poked and prodded a bit, it was all just a bit too difficult and a bit too complicated a bit too much not much fun.  Still, I followed what was going on.  The plan was to use the swell of consumer electronics to get a cheap android tv box that I could run linux on, and use as a small home server.  “Just use a raspi” you say.  Well, no.  Raspi3 is at least decently powerful, but running everything off a sdcard, and not having a case is really not what I was looking for.  Little tiny cute black boxes, with a remote control and a power supply and ethernet and usb shipped for $30?  That’s what I want to reuse.  Rockchip continued to contribute upstream, so I bought a MXQ 4K (RK3229).  New hotness I thought, but the cheap end.  I still believed that rockchip was doing the best job of upstream support.  Note: My copy of this device has a much smaller heatsink, Spectek flash, not Sandisk, and some generic no name ram chips. (See pics)

Top side, smaller heatsink, no name ram.

Top side, smaller heatsink, no name ram.

Maybe they are.  And I’ve not worked on amlogic or sunxi chips, but goddamn, the work environment is still just as sucky.  A garbage world of “custom roms” and complicated documentation detailing multiple ways of doing things with rarely any explanation of why.  I’ve still no idea, but some things seem a little clearer than last time… maybe?

If you just want to run linux, in _theory_ you can just use the existing android kernel shipped stock.  It has support for all your hardware, you just need to replace the root file system (RFS) and amend the kernel command line to say where your rootfs is.  Except, because some of the drivers are actually separate binary proprietary modules, you end up needing a fucking initrd/initramfs timewaste so it can have such core details like a functional fucking nand driver.  Why the fuck rockchip is keeping _this_ bit proprietary is beyond me.  So that gets non-trivial quickly.  You can in theory extract the modules from your android system image.  If you have a stock firmware, (“update.img”) you can use rkunpack from the rkflashtool repository.  you’ll probably have to unpack more than once.  Documentation on what’s what is less than forthcoming.  The “system.img” wil be a raw ext4 image (in theory) and you can mount it locally to explore with “sudo mount -o loop blah.img somemountpoint”

anyway, while some of this is just for my own notes, not really for anyone else, one thing has stuck out.  First, the default serial console is at 1500000 baud.  Thanks for nothing rockchip.  On a cp2102 serial dongle, you’ll need to use the silabs baud rate aliasing software to get to this baud rate.  Thanks for nothing silabs. and yeah, again, thanks for nothing rockchip.  The serial console is in the picture below.

Bottom side, spectek flash, serial console details

Bottom side, spectek flash, serial console details

Oh yeah, the “thing that has stuck out”  Despite being “unbrickable” because they have a maskrom bootloader, and normally just going into recovery mode,  I’ve had great difficulty.  After some bad flashing,  (bad why? no idea, rkflashtool or upgrade_tool both successfully report the flashing complete, then I reboot, and get…. bad things) the serial console will hang on a line like…

In
300MHz
DDR3
Bus Width=32 Col=10 Bank=8 Row=15 CS=1 Die Bus-Width=16 Size=1024MB
mach:2
OUT
Boot1 Release Time: 2016-03-15, version: 2.31
ChipType = c 275
No.1 FLASH ID:2c 64 64 56 a5 4
ECC:60
ReadRetry pageadd=15d800  ecc=3c err=ffffffff
Read pageadd=15d800  ecc=3c err=ffffffff
spare: 0x0:b8679151 b8679151 b8679151 b8679151 
ReadRetry pageadd=15d801  ecc=3c err=ffffffff
Read pageadd=15d801  ecc=3c err=ffffffff
spare: 0x0:527ded0c 527ded0c 527ded0c 527ded0c 
SdmmcInit=0 20
StorageInit ok = 134644
SecureMode : SBOOT_MODE_NS
powerOn 812121
Usb re Boot. 6812118

At this point, rkflashtool v will “fail” like so… (notice mangled text)

$ rkflashtool v
rkflashtool: info: rkflashtool v5.2
rkflashtool: info: Detected RK322X...
rkflashtool: info: interface claimed
rkflashtool: info: chip version: 322A-��..��-��

upgrade_tool will still say the device is connected, in “Loader” mode, and TestDevice, ReadFlashID, ReadFlashInfo and ReadChipInfo all still work. But attempting to download any image will fail saying parameter is invalid. rkflashtool p agrees.

 rkflashtool p
rkflashtool: info: rkflashtool v5.2
rkflashtool: info: Detected RK322X...
rkflashtool: info: interface claimed
rkflashtool: info: reading parameters at offset 0x00000000
rkflashtool: info: size:  0x0000ffff
rkflashtool: fatal: Bad parameter length!

One time this happened, I got out of it by having the USB-A-A cable disconnected (oh yeah, A-A for OTG? thanks for fucking nothing rockchip, hooray port overloads and reverse powering disasters) holding the recovery button down (with a toothpick down the SPDIF hole. (button down the AV hole _should_ be different but seems to behave the same for me)) and then plugging in the main power supply. Perhaps it had been a problem with powering the device purely via the A-A cable as I’d normally been doing?

Who knows. It’s currently in this state again, the unbrickable “bricked” Even shorting pins 7-8 on the NAND chip itself and powering up isn’t helping. (The “standard” rockchip method of getting back to maskrom mode) I get a different log, but it’s still non-responsive, even after inserting the A-A cable. (Still in loader, but not really working)

DDR Version V1.04 20160504
In
300MHz
DDR3
Bus Width=32 Col=10 Bank=8 Row=15 CS=1 Die Bus-Width=16 Size=1024MB
mach:2
OUT
Boot1 Release Time: 2016-03-15, version: 2.31
ChipType = c 276
No.1 FLASH ID:2c 64 64 56 a5 4
FlashLoadPhyInfo fail 2bc!!
sync para 32
sync para 32
ECC:60
ReadRetry pageadd=15d800  ecc=3c err=ffffffff
Read pageadd=15d800  ecc=3c err=ffffffff
spare: 0x0:b8679151 b8679151 b8679151 b8679151 
ReadRetry pageadd=15d801  ecc=3c err=ffffffff
Read pageadd=15d801  ecc=3c err=ffffffff
spare: 0x0:527ded0c 527ded0c 527ded0c 527ded0c 
SdmmcInit=0 20
StorageInit ok = 93093
SecureMode : SBOOT_MODE_NS
powerOn 770567
Usb re Boot. 6770565

So. No results, no future, but at least a weird log for the internet to archive if it helps anyone sometime.

Using NetBeans for STM32 development with OpenOCD

This post supersedes http://false.ekta.is/2012/05/using-netbeans-for-stm32-development-with-stlink-texane/ it has been updated for 2016 and current best software tools.  Again, this is only focussed on a linux desktop environment.

Required pieces haven’t changed much, you still need:

  1. A tool chain.
  2. GDB Server middleware (OR just a tool flashing if you want to live in the dark ages)
  3. A “sexy” IDE (If you disagree on wanting an IDE, you’re reading the wrong post)

Getting a toolchain

New good advice

Advice here hasn’t changed.  The best toolchain is still gcc-arm-embedded  They steadily roll out updates, it’s the blessed upstream of all ARM Cortex GCC work, and it has proper functional multilib support and proper functional documentation and bug reporting.  It even has proper multi platform binaries for windows and macs.  Some distros are packaging “arm-none-eabi-XXXXX” packages, but they’re often old, repackages of old, poorly packaged or otherwise broken.  As of November 2015 for instance, ArchLinux was packaging a gcc 5.2 binary explicitly for arm-cortex, that did not support the -mmcu=cortex-m7 option added in gcc 5.x series.  Just say no.

I like untarring the binaries to ~/tools and then symlinking to ~/.local/bin, it avoids having to relogin or start new terminals like editing .bashrc and .profile does.
~/.local/bin$ ln -s ~/tools/gcc-arm-none-eabi-5_2-2015q4/bin/arm-none-eabi-* .

Old bad advice

The internet is (now) full of old articles recommending things like “summon-arm-toolchain” (Deprecated by the author even) “code sourcery (lite)” (CodeSourcery was bought by Mentor, and this has been slowly killed off.  Years ago, this was a good choice, but all the work they did has long since been usptreamed)  You can even find advice saying you need to compile your own.  Pay no attention to any of this.  It’s well out of date.

GDB Server middleware

New good advice

Get OpenOCD. Make sure it’s version 0.9 or better. 0.8 and 0.7 will work, but 0.9 is a _good_ release for Cortex-M and STM32 parts. If your distro provides this packaged, just use it. Fedora 22 has OpenOCD 0.8, Fedora 23 has OpenOCD 0.9. Otherwise, build it from source

Old bad advice

Don’t use texane/stlink.  Just don’t.  It’s poorly maintained, regularly breaks things when new targets are introduced and not nearly as flexible as OpenOCD.  It did move a lot faster than OpenOCD in the early days, and if you want a simpler code base to go and hack to pieces for this, go knock yourself out, but don’t ask for help when it breaks.

Netbeans

No major changes here, just some updates and dropping out old warnings.  You should still setup your toolchain in netbeans first, it makes the autodetection for code completion much more reliable.  I’ve updated and created new screenshots for Netbeans 8.1 the latest current release.

First, go to Tools->Options->C/C++->Build Tools and Add a new Toolchain…
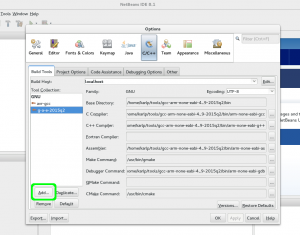
Adding a new toolchain to netbeans

Adding a new toolchain to netbeans

Put in the “Base directory” of where you extracted the toolchain.  In theory netbeans uses the base directory and the “family” to autodetect here, but it doesn’t seem to understand cross tools very well.
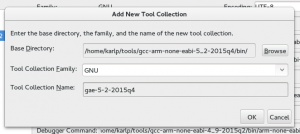
Base path for new toolchain and name

Base path for new toolchain and name

Which means you’ll have to fill in the names of the tools yourself, as shown below.  Click on “Versions” afterwards to make sure it all works.
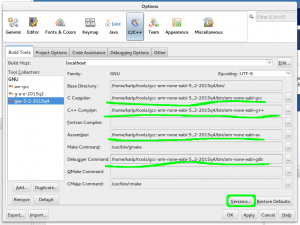
Adding explicit paths to netbeans toolchains

Adding explicit paths to netbeans toolchains

“Versions” should show you the right thing already, as shown
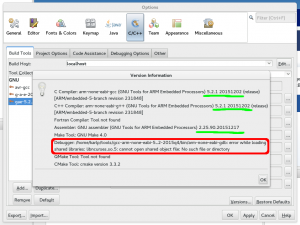
Versions from our new toolchain (and an error from gdb we must fix)

Versions from our new toolchain (and an error from gdb we must fix)

If you’re getting the error about ncurses from gdb, this because newer gdb builds include the curses “tui” interface to gdb in the standard build.  (Yay! this is a good thing!)  However, as the g-a-e toolchains are all provided as 32bit, you may be missing the 32bit ncurses lib on your system.  On Fedora, this is provided in the ncurses-libs.i686 package.

Ok, now time to build something.  This is your problem, I’m going to use one of the libopencm3 test programs right now, specifically, https://github.com/libopencm3/libopencm3/tree/master/tests/gadget-zero (the stm32l1 version)

Programming your device

Netbeans doesn’t really have any great way of doing this that I know of.  You can use build configurations to have “run” run something else, which works, but it’s a little fiddly.  I should spend more time on that though.  (See later for a way of doing it iteratively via the debugger console in netbeans)

In the meantime, if you just want to straight out program your device:

$ openocd -f board/stm32ldiscovery.cfg -c "program usb-gadget0-stm32l1-generic.elf verify reset exit"

No need for bin files or anything, there’s a time and a place for those, and if you don’t know and can explain why you need bin files, then elf files are just better in every way.

Debugging your part

GDB is always going to be a big part of this, but, assuming you’ve got it flashed, either by programming as above, then you can debug in netbeans directly.  First, make sure OpenOCD is running again, and just leave it running.


$ openocd -f board/stm32ldiscovery.cfg

First, install the gdbserver plugin, then choose Debug->Attach Debugger from the menu.
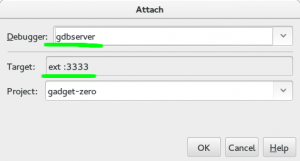
Attach to a gdbserver

Attach to a gdbserver

  • Make sure that you have “gdbserver” as the debugger type.  (Plugin must be installed)
  • Make sure that you have “ext :3333” for the target.  By default it will show “remote host:port” but we want (need) to use “extended-remote” to be able to restart the process. (See the GDB manual for more details)
  • Make sure that you have the right project selected.  There’s a bug in the gdbserver plugin that always forgets this.

At this point, “nothing” will happen.  If you look at the console where OpenOCD is running, you’ll see that a connection was received, but that’s it.
Press the “Pause” button, and you will stop execution wherever the device happened to be, and netbeans will jump to the line of code. In this example, it’s blocked trying to turn on HSE, as there’s no HSE fitted on this board:
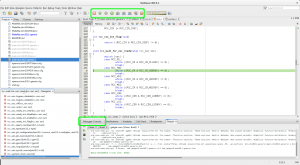
Source debugging in netbeans via OpenOCD

Source debugging in netbeans via OpenOCD

If you now set a breakpoint on “main” or anywhere early and press the “Restart” icon in the top, OpenOCD will restart your process from the top and stop at the first breakpoint. Yay!  If restart fails, make sure you used “extended-remote” for the target!

Bonus

If you click the “Debugger console” window, you can actually flash your code here too.  Leave the debugger running!  (No need to stop the debugger to rebuild) Make a change to your code, rebuild it, and then, on the “Debugger console” just enter “load” and press enter.  You’ll see the OpenOCD output as it reflashes your device.  As soon as that’s done, just hit the “Restart” icon in netbeans and start debugging your new code!
Cypress CY8CKIT-059 PSoC 5LP proto kit – first impressions

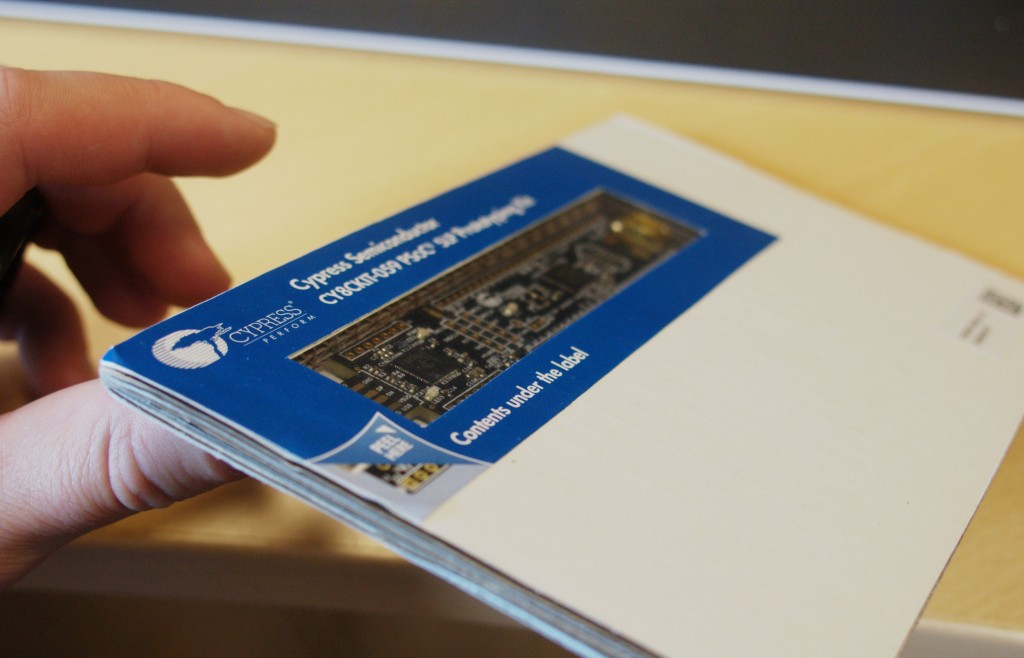
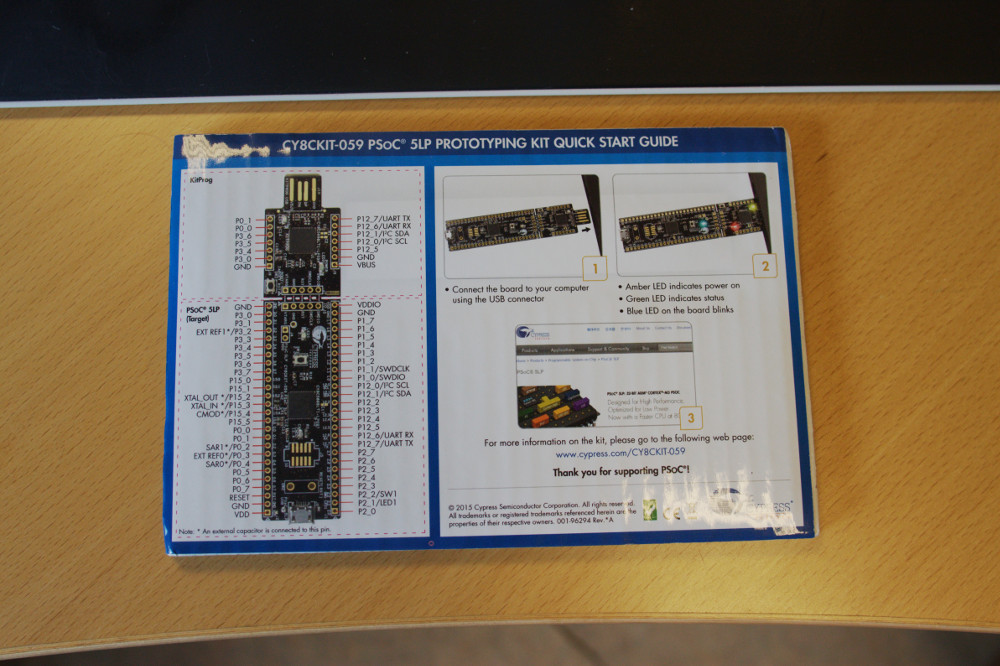
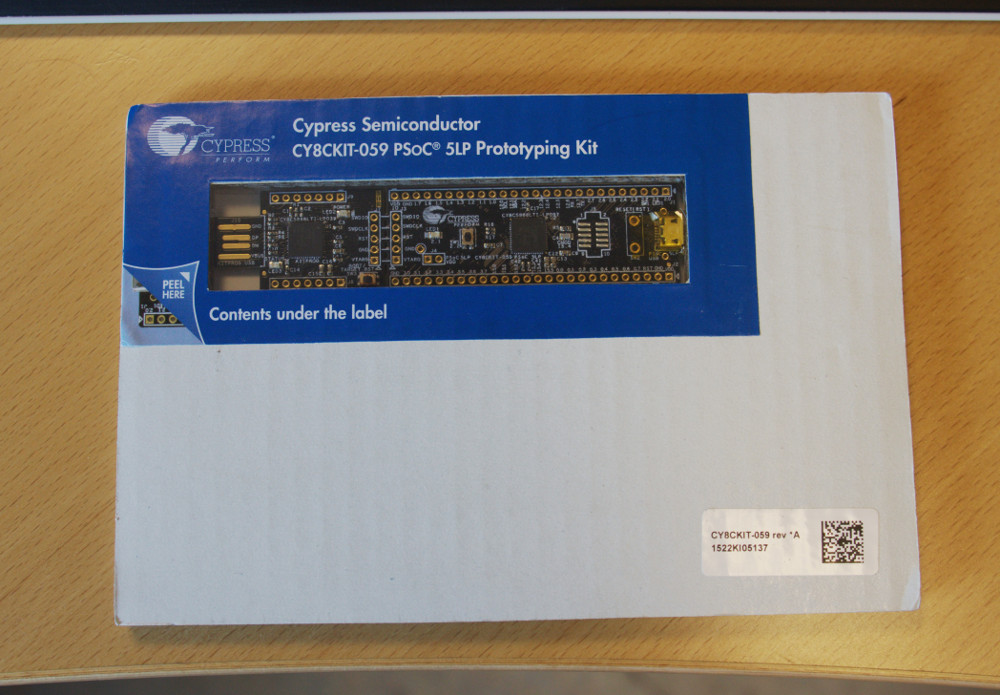
Love the packaging! I got this CY8CKIT-059 PSoC 5LP proto kit, and the CY8CKIT-049-42xx, the PSoC 4 proto kit, as they’re both super cheap, and they both came in rather excellent packaging. The pcb is behind a peel off window, in a cutout of a sandwich of three sheets of corrugated cardboard. The backside has a nice graphical layout with pins labelled, and some basic info on where to get more info. Very nice, compact, easy to ship, well done Cypress.
cypress-kit-edge-on_sm

cypress-kit-backside_sm

cypress-kit-front_sm

Of course, that’s about all that’s nice. The PSoC family seems interesting, I’ve been wanting to play with them for a while, but Cypress has absolutely zero linux support, and because of the configurable nature of the device, you really do seem to need to use their windows PSoC Creator tool. Allegedly once you’ve designed your system, you can edit the code portions freely, but it seems a long way off. OpenOCD has support for the flash in the PSoC 4 family, but nothing (yet) for the flash, and definitely no support for the KitProg programming dongle. That KitProg does seem like a nice bit of gear in it’s own right though, it’s USB2I2C, USB2UART, SWD debug adapter, on a little snap off portion of the board. However, even the USB2UART portion fails to be recognised as CDC-ACM in linux, presumably due to a bug in the descriptors. lsusb implies that they’re trying to be CDC-ACM. This one will have to be on the shelf for quite a while I’d imagine.

Full lsusb output for posterity here:

Bus 003 Device 011: ID 04b4:f139 Cypress Semiconductor Corp. 
Device Descriptor:
  bLength                18
  bDescriptorType         1
  bcdUSB               2.00
  bDeviceClass          239 Miscellaneous Device
  bDeviceSubClass         2 ?
  bDeviceProtocol         1 Interface Association
  bMaxPacketSize0         8
  idVendor           0x04b4 Cypress Semiconductor Corp.
  idProduct          0xf139 
  bcdDevice            2.0b
  iManufacturer           1 Cypress Semiconductor
  iProduct                2 Cypress KitProg
  iSerial               128 1C210338012E4400
  bNumConfigurations      1
  Configuration Descriptor:
    bLength                 9
    bDescriptorType         2
    wTotalLength          130
    bNumInterfaces          4
    bConfigurationValue     1
    iConfiguration          2 Cypress KitProg
    bmAttributes         0x80
      (Bus Powered)
    MaxPower              400mA
    Interface Descriptor:
      bLength                 9
      bDescriptorType         4
      bInterfaceNumber        0
      bAlternateSetting       0
      bNumEndpoints           2
      bInterfaceClass         3 Human Interface Device
      bInterfaceSubClass      0 No Subclass
      bInterfaceProtocol      0 None
      iInterface              3 KitBridge
        HID Device Descriptor:
          bLength                 9
          bDescriptorType        33
          bcdHID               1.11
          bCountryCode            0 Not supported
          bNumDescriptors         1
          bDescriptorType        34 Report
          wDescriptorLength      43
         Report Descriptors: 
           ** UNAVAILABLE **
      Endpoint Descriptor:
        bLength                 7
        bDescriptorType         5
        bEndpointAddress     0x83  EP 3 IN
        bmAttributes            3
          Transfer Type            Interrupt
          Synch Type               None
          Usage Type               Data
        wMaxPacketSize     0x0040  1x 64 bytes
        bInterval               1
      Endpoint Descriptor:
        bLength                 7
        bDescriptorType         5
        bEndpointAddress     0x04  EP 4 OUT
        bmAttributes            3
          Transfer Type            Interrupt
          Synch Type               None
          Usage Type               Data
        wMaxPacketSize     0x0040  1x 64 bytes
        bInterval               1
    Interface Descriptor:
      bLength                 9
      bDescriptorType         4
      bInterfaceNumber        1
      bAlternateSetting       0
      bNumEndpoints           2
      bInterfaceClass       255 Vendor Specific Class
      bInterfaceSubClass      0 
      bInterfaceProtocol      0 
      iInterface              5 KitProg Programmer
      Endpoint Descriptor:
        bLength                 7
        bDescriptorType         5
        bEndpointAddress     0x81  EP 1 IN
        bmAttributes            2
          Transfer Type            Bulk
          Synch Type               None
          Usage Type               Data
        wMaxPacketSize     0x0040  1x 64 bytes
        bInterval               0
      Endpoint Descriptor:
        bLength                 7
        bDescriptorType         5
        bEndpointAddress     0x02  EP 2 OUT
        bmAttributes            2
          Transfer Type            Bulk
          Synch Type               None
          Usage Type               Data
        wMaxPacketSize     0x0040  1x 64 bytes
        bInterval               0
    Interface Association:
      bLength                 8
      bDescriptorType        11
      bFirstInterface         2
      bInterfaceCount         2
      bFunctionClass          2 Communications
      bFunctionSubClass       0 
      bFunctionProtocol       0 
      iFunction               0 
    Interface Descriptor:
      bLength                 9
      bDescriptorType         4
      bInterfaceNumber        2
      bAlternateSetting       0
      bNumEndpoints           1
      bInterfaceClass         2 Communications
      bInterfaceSubClass      2 Abstract (modem)
      bInterfaceProtocol      0 None
      iInterface              4 KitProg USBUART
      CDC Header:
        bcdCDC               1.10
      CDC ACM:
        bmCapabilities       0x02
          line coding and serial state
      CDC Union:
        bMasterInterface        2
        bSlaveInterface         1 
      CDC Call Management:
        bmCapabilities       0x00
        bDataInterface          1
      Endpoint Descriptor:
        bLength                 7
        bDescriptorType         5
        bEndpointAddress     0x85  EP 5 IN
        bmAttributes            3
          Transfer Type            Interrupt
          Synch Type               None
          Usage Type               Data
        wMaxPacketSize     0x0008  1x 8 bytes
        bInterval               2
    Interface Descriptor:
      bLength                 9
      bDescriptorType         4
      bInterfaceNumber        3
      bAlternateSetting       0
      bNumEndpoints           2
      bInterfaceClass        10 CDC Data
      bInterfaceSubClass      0 Unused
      bInterfaceProtocol      0 
      iInterface              4 KitProg USBUART
      Endpoint Descriptor:
        bLength                 7
        bDescriptorType         5
        bEndpointAddress     0x86  EP 6 IN
        bmAttributes            2
          Transfer Type            Bulk
          Synch Type               None
          Usage Type               Data
        wMaxPacketSize     0x0040  1x 64 bytes
        bInterval               0
      Endpoint Descriptor:
        bLength                 7
        bDescriptorType         5
        bEndpointAddress     0x07  EP 7 OUT
        bmAttributes            2
          Transfer Type            Bulk
          Synch Type               None
          Usage Type               Data
        wMaxPacketSize     0x0040  1x 64 bytes
        bInterval               0
Device Status:     0x0000
  (Bus Powered)
$

The KitProg also has a bootloader of some form, if you hold down reset while plugging it in, though it times out and reboots normally after a couple of seconds idle.

Bus 003 Device 012: ID 04b4:f13b Cypress Semiconductor Corp. 
Device Descriptor:
  bLength                18
  bDescriptorType         1
  bcdUSB               2.00
  bDeviceClass            0 (Defined at Interface level)
  bDeviceSubClass         0 
  bDeviceProtocol         0 
  bMaxPacketSize0         8
  idVendor           0x04b4 Cypress Semiconductor Corp.
  idProduct          0xf13b 
  bcdDevice            1.00
  iManufacturer           1 Cypress Semiconductor
  iProduct                4 KitProg Bootloader
  iSerial               128 1C210338012E4400
  bNumConfigurations      1
  Configuration Descriptor:
    bLength                 9
    bDescriptorType         2
    wTotalLength           41
    bNumInterfaces          1
    bConfigurationValue     1
    iConfiguration          2 Configuration 0x0001
    bmAttributes         0x80
      (Bus Powered)
    MaxPower              500mA
    Interface Descriptor:
      bLength                 9
      bDescriptorType         4
      bInterfaceNumber        0
      bAlternateSetting       0
      bNumEndpoints           2
      bInterfaceClass         3 Human Interface Device
      bInterfaceSubClass      0 No Subclass
      bInterfaceProtocol      0 None
      iInterface              3 Interface 0x0001
        HID Device Descriptor:
          bLength                 9
          bDescriptorType        33
          bcdHID               1.11
          bCountryCode            0 Not supported
          bNumDescriptors         1
          bDescriptorType        34 Report
          wDescriptorLength      36
         Report Descriptors: 
           ** UNAVAILABLE **
      Endpoint Descriptor:
        bLength                 7
        bDescriptorType         5
        bEndpointAddress     0x01  EP 1 OUT
        bmAttributes            3
          Transfer Type            Interrupt
          Synch Type               None
          Usage Type               Data
        wMaxPacketSize     0x0040  1x 64 bytes
        bInterval               1
      Endpoint Descriptor:
        bLength                 7
        bDescriptorType         5
        bEndpointAddress     0x82  EP 2 IN
        bmAttributes            3
          Transfer Type            Interrupt
          Synch Type               None
          Usage Type               Data
        wMaxPacketSize     0x0040  1x 64 bytes
        bInterval               1
Device Status:     0x0000
  (Bus Powered)