Adafruit shipping costs == (unintentional) price padding.

Update: 2010-03-19.  You should probably read the comments, as well as the post after this.  Adafruit fully refunded all shipping, something I never asked for, but much more usefully, they overhauled their shipping weights calculator.  This a Good Thing™  My original order now calculates out to 0.9 pounds including packaging, or 43% less than originally.  (Still a touch high, but nothing to complain about, and as long as they still want to work in fractional pounds, it’s probably as good as can reasonably be expected)

Original below…..

So, adafruit make some great products, and ladyada.net is a great resource.  That said, their shipping (at least internationally) is rather obscene.  I recently received a parcel charged for 1.6 lbs USPS shipping, $18.52.  Ok, that’s pretty much what USPS says for shipping with an allowance for packaging.  No big deal.

Until I thought about how much 1.6 lbs really was. And what the parcel actually weighed.  (I’m sorry, I don’t have a weight before I opened it up.)

  • 2x XBee adapator kit, in packaging.  12g each  ==> let’s be generous and say 40g.
  • 1x half size breadboard. 40g  ==> let’s say 50g
  • 8xmagnets, wrapped in paper, another 50g  ==> let’s say 100g!
  • 1x padded envelope ==> 50g, let’s say 100g again!

So, even being generous, I’m up to…..300g. 0.66lbs. not 0.75 lbs.  Not 1.  Certainly not 1.5, and one hell of a long way from 1.6!

So, really, this just pushes me to get my board designs finished up so I don’t have to use her xbee adaptor boards anymore.  And, adafruit just goes on the list of companies with rather less than ideal international shipping policies.

(digikey still takes the cake for screwing international customers as best they can though)

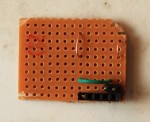
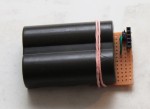
BP-511 breadboard adaptor, reusing nice batteries for my own needs

When I upgraded my camera due to the death of my dear beloved Canon 300D, I was left with a handful of BP-511 batteries, 1200mAh and up, with a nice charger. Except, they don’t really plug into anything very well. With a growing proliferation of small battery powered nodes around the house, I thought I should be able to reuse these. I’m probably burning some extra power by running these 7.5V batteries down to 3.3V, but I’m cool with that. Any production boards would be running on 2-3 AAs anyway, with a “proper” connector. But this is still pretty handy.

I just put some loops of bare copper wire on some strip board to make contacts, and then put in some headers to make it easier to connect to things. Presto!

Pachube exporting now in place

Pachube is an interesting looking site. They don’t really seem to have all that many users, but hey, if they’re going to graph all my data for me, cool. It’s not exactly top secret information. I still don’t have things like the (new!) humidity sensor calibrated, but hey, it’s uploading, and it’s graphing.
TinyTemp has the initial atTiny85 based temperature sensor, and FreqyTemp has the new mega328 based temperature and relative humidity sensor. (more on that still to come)

The max/min values are off from some errors I was getting while I was setting this up, but hey, the more data exports the better right?
Github has the code

karlnet svn moved to github

because it’s just better for sharing than an svn repo hosted on my home dsl, I’ve moved all the karlnet sensor code over to github.

Spring JAX-WS clients, with less config

More with less. I got rather annoyed at some of the default messages that came out of the JaxWsPortProxyFactoryBean. Things like, “service name blah does not exist in the wsdl, did you mean wop?” Well, SURE! I told you the wsdl, there’s only one service, I mean THAT ONE!

So, I made my own port proxy factory….

Ugly old way

portname, serviceName and namespaceUri are all completely mechanical drudgery, but you have to get them exactly right.

    <bean id="oldStyleClient" class="org.springframework.remoting.jaxws.JaxWsPortProxyFactoryBean">
        <property name="serviceInterface" value="full.class.path.IService"/>
        <property name="wsdlDocumentUrl" value="http://server:port/webapp/services/BlahService?wsdl"/>
        <property name="endpointAddress" value="http://server:port/webapp/services/BlahService"/>
        <property name="lookupServiceOnStartup" value="false"/>
        <property name="portName" value="BlahServiceSOAP"/>
        <property name="serviceName" value="BlahService"/>
        <property name="namespaceUri" value="http://some.namespace/from/the/wsdl/"/>
    </bean>

Sexy new way

Sexy ways are always better ways.

    <bean id="potsClient" class="is.vf.common.jaxws.SimpleJaxWsFactory">
        <property name="serviceInterface" value="full.class.path.IService"/>
        <property name="localWsdlName" value="/BlahService.wsdl"/>
        <property name="endpointAddress" value="http://server:port/webapp/services/BlahService"/>
    </bean>

Hooray! So how? Just xpath into the wsdl! I used dom4j, because I’ve already got that in my app, but you could use anything really. I briefly tried using the xml apis in the jdk, but gave up very quickly.

Full Source below

package blah;
 
import org.dom4j.Document;
import org.dom4j.DocumentException;
import org.dom4j.Node;
import org.dom4j.io.SAXReader;
import org.springframework.remoting.jaxws.JaxWsPortProxyFactoryBean;
import java.net.URL;
 
/**
 * Set up a jaxws client with less effort.
 * Originally, I couldn't work out how to get spring/jaxws to reference a local wsdl file that was actually inside a jar.
 * And then, because I was damn sick of having to go and look up hardcoded strings from the wsdl just to copy into the config,
 * I decided to just read the damn wsdl and suck up the necessary blobs myself.
 *
 * No guarantees that this will work on all wsdls, but most people use the wsdl: prefix right?
 * Now, the only _required_ parameters are, localWsdlName and serviceInterface! whee. 
 * @author karlp
 *         Date: 8.2.2010
 */
public class SimpleJaxWsFactory extends JaxWsPortProxyFactoryBean {
    private String localWsdlName;
 
    /**
     * use dom4j to determine what's in the wsdl.
     * (I tried using the java built in methods, but a) it's ugly, and b) it didn't work)
     * Then just go back to the parent to load up the rest of the properties, now that we've done  the tedious ones...
     */
    @Override
    public void afterPropertiesSet() {
        if (localWsdlName != null) {
            URL url = getServiceInterface().getResource(localWsdlName);
            setWsdlDocumentUrl(url);
            Document doc;
            try {
                doc = new SAXReader().read(url);
            } catch (DocumentException e) {
                throw new IllegalStateException("Shouldn't be getting exceptions reading your local wsdl!" + e.getMessage(), e);
            }
            this.setServiceName(doc.selectSingleNode("//wsdl:service/@name").getStringValue());
            this.setPortName(doc.selectSingleNode("//wsdl:service/wsdl:port/@name").getStringValue());
            this.setNamespaceUri(doc.selectSingleNode("/wsdl:definitions/@targetNamespace").getStringValue());
        }
        super.afterPropertiesSet();
    }
 
    /**
     * This is the name of the wsdl, as seen in the jar containing the {@link serviceInterface}
     * @param localWsdlName the path to the wsdl in the containing jar
     */
    public void setLocalWsdlName(String localWsdlName) {
        this.localWsdlName = localWsdlName;
    }
}

stomp: more with less. Publishing for the masses, rather than doing everything yourself

The early prototype head end software for karlnet did all the decoding of the wireless frames, and also handled doing something with the data, in that case, sticking it all into RRD databases so that tools like Cacti could make me some pretty graphs of the temperature. Now, that sort of architecture doesn’t scale very well, and it was about to become quite a pig when I started adding more nodes.

I already had more things I wanted doing, I wanted webpages, I wanted to try out some different RRD graphing engines (cacti is a bit of a pig to configure, but it does make nice graphs)

What I really wanted was to put all the hard work of reliably slurping data off the xbee network into one place, and put all the user applications that use that data somewhere else. (Reliably reading off the xbees is the topic of another post)

I’d been very happy with python for the serial decoding so far, but I certainly didn’t want to restrict myself to just python. I also wanted to make sure that anyone who wanted to could write an application using the data, not just me. A message bus was exactly what I wanted, and although it’s a little bit of a “big enterprise buzzword” it really doesn’t have to be. Or at least, you don’t have to be scared by it.

Stomp is one of the simpler, lighter weight message bus protocols. With a suitable “broker” (the name of the magic blob of software that handles all the messages) you can quite easily publish a message, like, “node:1, sensorA: 19 degrees Celsius” and then _anyone_ else who had registered that they were interested in receiving temperature readings would be delivered a copy of the message. Whether there was one listener, or one hundred.

With the 5 second pub/sub overview out of the way, how did I do it?

ActiveMQ is a well established solid player in the message bus world, and although traditionally associated with JMS messaging, it also has built in stomp support. Surprisingly, there was no package for activemq for ubuntu 9.10, but the installation is straightforward (some new skills learnt will go in another post) and then the instructions for enabling stomp are very clear.

Now, trying it out! I use stompy for python support. I also tried stomp.py, but it did nasty things like swallowing keyboard interrupts, so you couldn’t kill your scripts with ^C. I don’t recommend it. I simply tried it first :(

Stompy was easy!

import random, time
from stompy.simple import Client
stomp = Client("hostname of activemq/stomp")
stomp.connect()
while True:
     stomp.put("fake sensor1: %d" % random.randint(0,50), destination="/topic/karlnet")
     time.sleep(5)

Tada! And likewise for any receiver…

....
stomp = Client("hostname")
stomp.connect()
stomp.subscribe("/topic/karlnet")
while True:
     message = stomp.get()
     print "hohoho, we got some sensor readings: " + message.body

Now that’s cool, but we’re only sending fixed strings there, we want real objects! We need to be careful not to use anything python specific here, because we can’t control (and don’t want to control) who’s listening at the other end. XML or JSON are probably the simplest choices here, though you could come up with your own custom scheme here, even just manual string parsing, if you were you were really masochistic.

I chose JSON, mostly because my day job has enough XML, and JSON seems like a perfectly reasonable alternative. The python standard library json might be enough for you, but my message format is an object, not a dictionary of key/values, so I had to use jsonpickle

So, the final shiny fake sender / receivers are in svn, and in the same consumers/producers directories, you can see the two real apps, the main producer, reading data from the base station Xbee, and a simple script that updates RRD databases. That code is beautifully simple now that it’s been extracted out of the nitty gritty of the sensor network code.

Finally, for an example of what can be done now that we live in the future, have a read of Stomp on WebSockets and perhaps even a look at consumers/simple_web in svn.

TinyTemp: karlnet sensor node 1.

Also known as, massively overpowering a tiny system. With 2 xbees, and 2 xbee adapter boards from adafruit, making it easy to try things out on some breadboards, it was time to get to work.

I had to get setup for embedded development again, and with orders from overseas taking a rather long time to get to Iceland, I made do with what I had on hand.

ATTiny85’s are cool little chips. Not every day you get happy little 8 pin PDIP packages that can do so much. Not many pins mind you, but still, it’s so TINY! and it’s not even surface mount!

So I got one of these set up on a board, after some basic blink testing, set about putting together “TinyTemp” probably the most outrageous wireless sensor mote ever made.
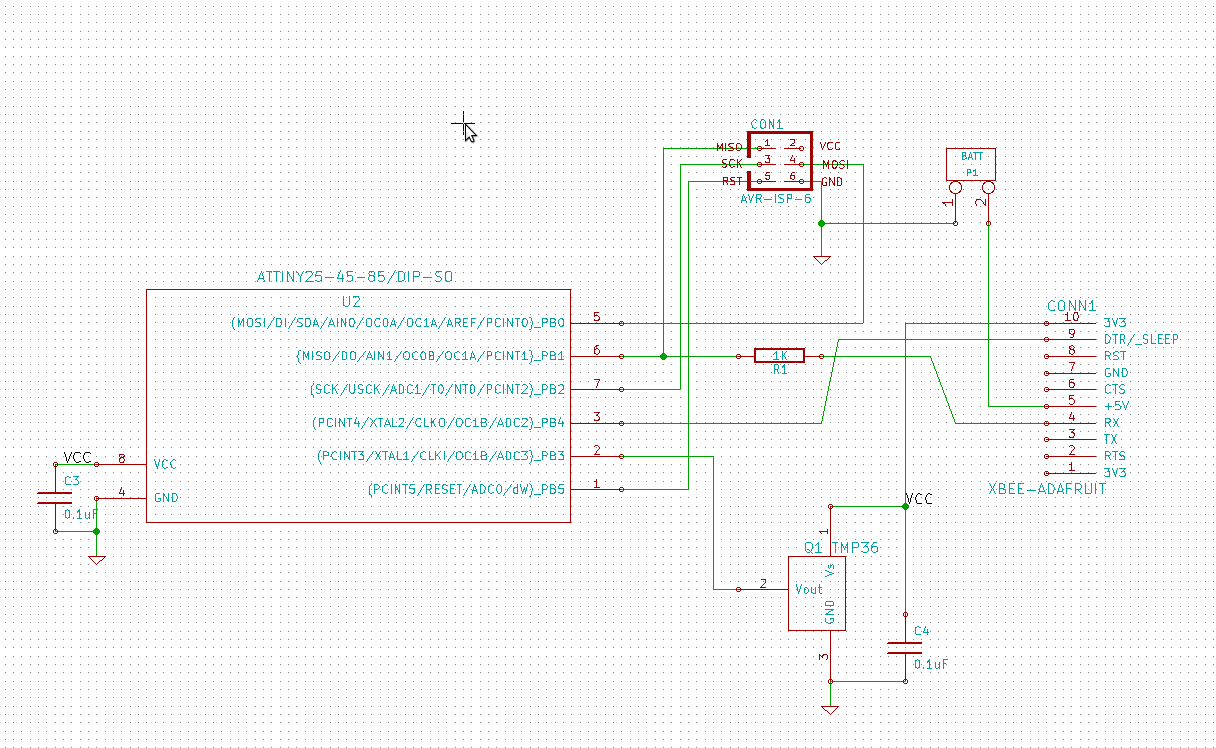
Schematic for TinyTemp

There’s lots that is “wrong” with this design. It’s ~$US35-40 in parts for starters. But, that isn’t it’s purpose. This is really just a development node. Any serious node would get done up on it’s own board, which would reduce the partcount, reduce the size, reduce the cost, improve the reliability, and certainly improve the professionalism :) (Also, [2])

It’s something that I think JeeLabs are doing slightly backwards. While I love their boards and their designs, I kind of feel that their fixed base board with extension modules is not the best permanent solution. I’m not sure it provides the best development environment for working on something better either. Or maybe I’m just jealous that he has so many good bits working already :) (Also, they’re nice and cheap!)

I’m happier with some fairly ugly prototypes on breadboards, and then getting some boards made just for that node, and nothing more. I don’t need them to be physically expandable. If it’s just a tiny, compact node that does one thing well, it should just stay as one tiny compact that does one thing well. If you need more, you get a different node, or you put two nodes at the same location.

But back to the board. I had a few goals that I wanted to explore with the board.

TX through the xbee

I only wanted to send data, and I didn’t need to be doing anything else, so I needed to get the USI module to do ordinary old UART to talk to the xbee. A bit of an adventure in software, and app notes from atmel, and counting bits in microseconds by hand Wondering why there wasn’t a reliable software uart library. Finding out that most of my problems were a very flaky serial port on one of my computers, and it was simply mangling all the data. Primary mission accomplished. [1]

power consumption

With the radio turned on, and simply using busy waiting for the 5 second interval between sensor readings, and running on 5V, at the default 8MHz, the board was sucking down ~70mA. Wayyy to much to run on batteries!

Enabling pin sleep on the xbee’s, and using up one of the valuable io pins on the tiny85 to switch the radio on and off for only long enough to send the data burst was a massive reduction. Straight down to about 20mA.

Next was actually sleeping in the AVR, instead of busy waiting, which reduced it further, but not as far as I would have liked. Then, I cut the clock down as low as it would go, so that a single timer overflow would take the entire 5 seconds. That got me down to about 5mA, which, running at 5V with a venerable, but leaky 7805, was about as good as I could get.

Until, remembering that the xbee was 3.3V max, and the adapter boards had an onboard ultra low quiescent current regulator (good job lady ada) I rerouted the battery through the adapter board, and ran the whole thing off 3.3V instead of 5. Presto. Down to 550uA

There’s a few more tricks that could be pulled yet, but that’s enough for now. (For instance, it’s _possibly_ less power to use cycling sleep on the xbee to wakeup the AVR, instead of the other way round)

Full source for the node, as well as the kicad schematic files are available in the karlnet svn repository

Now, with one real node alive and sending data, it was time to get onto some server software.

[1] There’s something very very screwy with the USB-serial connection on one of my computers. It doesn’t happen on any of the other ones, but one one, (unfortunately the one best suited to being the always on base station) The serial port seems lose a LOT of packets. This was exceptionally tedious, until I ended up with a LOT more error handling in the xbee-api mode python receiver. It will still drop packets, but now it reliably recovers within 3 packet times, before it could get some bad data and block almost forever. I’m not sure, but I feel it’s a kernel problem related to some changes in lirc usb polling rate. Kinda hard to prove though.

[2] Xbee’s actually have onboard ADCs, there’s no particular reason to put another micro on the board. Or is there? In this case, probably not, I could just use cyclic sleep with a nice long delay to get it to sample the thermometer. But, maybe not always. Cyclic sleep is still more power consumption than pin hibernate. And in a lot of cases, you might want to actually control something locally, and that’s not something you can easily do with sending pin change packets to a solitary xbee.
karlnet – a wireless sensor network that hopefully doesn’t suck.

I’ve been thinking about wireless sensor networks a lot, and for a while now. It’s something I’ve always been interested in, accumulating vast amounts of data and making pretty charts. But not just sensing, also control. I home brew beer, and also make cheese from time to time, both of which benefit from temperature control at the very least. Custom controllers for brewing or cheese making are quite common, and if you add the words “arduino” it even becomes ?cool?

So, why can’t these be the same devices? And why are all these controllers implemented completely locally? Things like HABS are cool and all, very neat bits of engineering, but why on earth do I want the times of my hop additions to be stored in EEPROM on device itself? And why are all these wireless sensors so expensive? I can get a nice weather station, max, min, humidity, indoor outdoor, but no data logging. The minute you add wireless datalogging the price jump is rather more than I feel it should. And heaven help you if you think “this has been done in industry, surely they don’t pay so much?” Well, seems they do.

So, enough rambling background, what am I going to do about it? Well, my basic idea was to have a bunch of nodes (I think “mote” is the word du jour) that are totally dumb. They can read some local sensor values, and if told to, turn on or off some outputs. But mostly, they just send raw unprocessed data back to base. And then instead of doing application programming for a brewery control system in embedded C and counting bytes and memory accesses, we can use any language we like, with any user interface we like, using nice tools that we like.

Seems simple right? Why isn’t it done? I’m not sure, and I really haven’t done as much research as I could have, but suffice to say, I can’t go down to the store and get 4-5 temperature/humidity monitoring units, a single base station, dumping data in any open format that I know of. At least, not cheap.

And, of course, certainly not as much fun as reinventing the wheel in the name of training. :)

Which brings us to the hardware. (The software can always be fixed and shipped later right?) I’ve gone with Xbee’s, or plain 802.15.4 for the wireless layer. These are pretty nice, reasonable throughput, low power, good enough range for reliable in home monitoring, security built in, and cheapish. At least, I thought they were a steal when I first found them. All this in a drop in module for only $US20 woot! Bluetooth or wifi cost double or triple that, and though you can get some FM modules, and 400MHz modules, you then have a lot more problems with interference, and you miss out on the built in addressing of 802.15.4.

I’ve since found things like Hope RF’s RFM12b and friends, which seem to be a pretty good compromise in between. Anyway, if the general hardware and system design is ok, it shouldn’t be a problem to have multiple radio types in the network right? As long as the base station can understand them all, you should be fine.

So, Xbee’s for now. For microcontrollers, AVRs win hands down. Being able to use plain old gcc, with plain old C, on plain old chips is a huge plus. Also, given how plentiful flash and ram is on even the tiniest little 8 bit microprocessor these days, you don’t even have to use ugly plain old C. The rise of physical computing, the trendy new thing for artists to be involved in, has brought about some very welcome changes in the world of the embedded hobbyist. The arduino platform, simplifying and hiding a lot of the ugly guts has done magnificent work, and has led to wonderfully low prices on high quality dev boards. Have a look at Modern Device or JeeLabs or pjrc’s Teensy for some good quality development and hobby boards. The dev boards I cut my teeth on in university cost nigh on $100, were 5 times the size, and had a fraction of the power and capability. Technology, plus a massive surge in demand, (I’ll even shout out to Make for some of it) has really brought out some great designs, at great prices.

There are some other great microprocessor options, looking strictly at a features/price point, but you need to be prepared for custom tool suites, or worse yet, paying for tools. No Fun.

And that’s the general idea. A bunch of dumb (yet very smart and overly powerful) AVR micros, hooked up to a bunch of simple, easy, cheap(ish) xbee radio modules, just sending sensor data back to a base station, and being told what to do. Put all the smarts up in an environment where it’s easy.

Over the next few articles/days/weeks I’ll be expanding on this, with what I’ve done so far, and where I’m at in my own personal implementation of this :)

spring, jaxws and session scope beans

Remember kids, if you’re using com.sun.xml.ws.transport.http.servlet.WSSpringServlet to have spring and jaxws webservices, you can’t use things like scope=”session” on your beans. At least, not without adding a listener to your web.xml…

    <listener>
        <listener-class>org.springframework.web.context.request.RequestContextListener</listener-class>
    </listener>

Listener not required if you’re using spring’s regular DispatcherServlet

avrdude: initialization failed, rc=-1 clocks, prescalars and fuses

So, if you’re trying to program your avr, and you get this message

$ avrdude -p attiny85 -c usbtiny -u   -U flash:w:tinytemp.hex 

avrdude: initialization failed, rc=-1
         Double check connections and try again, or use -F to override
         this check.


avrdude done.  Thank you.

And it worked before. What on earth went wrong? So you check the wiring. But it’s good. Of course it’s good, you haven’t touched it, you just recompiled and hit program again. So you hop online and find people saying a few things like “check the wiring” and a few hints, that perhaps there’s something to do with -B and matching up clocks. Here was me thinking that the programmer put it into reset and then provided it’s own clock via SCK, so who the hell cared what the device clocking was configured at.

I’d just done some power trickery, slowing down the clocks and timer scalars and resetting them at runtime, brining my boards power consumption from ~70mA down to 1.5mA at idle, but now the damn thing wouldn’t program! I couldn’t believe that avrdude had wrecked the fuses or anything, I’d have no warnings or messages, it just stopped working.

Lady Ada suggested that -B 32 should enough for just about anything. It’s not. But after an hour of double checking wiring and even pulling the chip out and putting it on a dedicated ICSP board, and getting the same damn error over and over, I tried drastic measures. I had even tried a virgin chip, straight from the foil and tube. It worked just fine, my chip, nothing. But…

avrdude -B 100000 -p attiny85 -c usbtiny -U lfuse:r:-:b

-B 100000 worked magic! And now, for god knows reason, it works again normally now too. *grumble*grumble*

Update: It still happened fairly often, but I got away with it at -B 300, which is much faster for programming than -B 100000